Today we have a guest chef in the Cooking Corner, my friend, David G. Woolley from Top Of The Morning. He allowed me to post his recipe here on certain conditions, which are:
As long as you post the following at the top of your how to cook blog in Big, Bold letters with a link over TOP OF THE MORNING BLOG, we will, in this one instance allow it."This recipe is used here by permission of the Top of the Morning blog staff. All tomato rights reserved. Reference to the snot setting is not necessarily associated with the Top of the Morning, its owners or share holders.".
You can also read the post that led up to this recipe here. Do that while your veggies are cooking. In the mean time, hang in there, stay with me and you will be glad you did. This is by far the best tomato soup I have ever eaten. Well worth the conditions stipulated by David.
David doesn't use lists when he tells you how to make something. Lucky for you that I happen to speak male and can translate his narrative into cooking jargon. Here we go: (David's words in red, mine in black)
Tomato Soup
14 oz can of diced tomatoes- drained- reserve juice (if you want more tomato flavor and deeper color, add more diced tomatoes)
Olive oil
Black Pepper
1 white onion- chopped (see how to chop an onion here).
Carrot
2 garlic cloves
Celery Stalk
8 oz can tomato sauce
10-14 oz chicken broth
Bay leaf
Soy milk *optional
While the tomatoes are baking, cut up a whole white onion, a carrot, two garlic cloves, a celery thingy (is it called a stalk?), the saved back tomato juice along with about 8 ounces of tomato sauce and a can of chicken broth. Simmer all of this stuff in a soup pan with about 1/2 cup of olive oil and a bay leaf until the veggies are tender.
Soy milk *optional
While the tomatoes are baking, cut up a whole white onion, a carrot, two garlic cloves, a celery thingy (is it called a stalk?), the saved back tomato juice along with about 8 ounces of tomato sauce and a can of chicken broth. Simmer all of this stuff in a soup pan with about 1/2 cup of olive oil and a bay leaf until the veggies are tender.
This is David's second step, but it makes more sense to me to do it first, so I am going to take a risk and give you the instructions out of order here.
 I use my handy dandy veggie chopper for carrots, it goes so much quicker. The smaller you chop them, the faster they cook.
 Don't they look pretty together?
  To peel the garlic cloves, lay it on the cutting board and using the heel of your hand, press down. Then just peel and chop.
If your hands smell like onion and garlic- rub them over your stainless steel faucet while you are washing them. It will take away the smell.
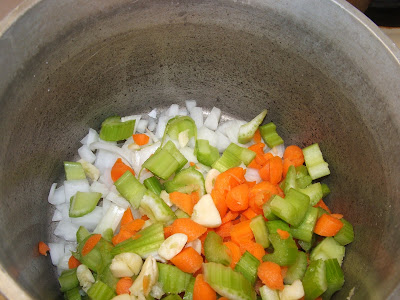 In the pot ready for the reserved tomato juice, tomato sauce and chicken broth.
 Tomato sauce. So many kinds to choose from. The one in the yellow can, El Pato, is one of my favorite, but you have to be willing to have tomato sauce with a kick. Today I chose the Western Family tomato sauce with no salt added.
 I also chose the chicken broth with less sodium
On a baking sheet empty one 14 oz. can of diced tomatoes and save back any juices. I never have more than a few spoonfuls. Is it really worth saving back three tablespoons? You can throw in more diced tomato if you like your soup deeper orange in color and more tomato flavor. Cover the tomatoes with between 1/4 cup and 1/3 cup of olive oil. Season with some pepper. Bake for 15-20 mins at 450 degrees. Its supposed to caramelize the tomatoes. Mine just get sizzling hot. Must be the altitude.
 Notice all the different kinds of diced tomatoes you can get? I chose to use the Fire Roasted tomatoes today, but next time I think I will try the Lime and Cilantro or the Chipotle Chilies just for a little kick.
 Here they are on the baking sheet ready to go into the oven. Drain them before you put them on the sheet, but save the juice.
 Drizzle the tomatoes with 1/4-1/3 cup olive oil. Try and get the olive oil that is first cold pressed.
Season them with some black pepper. Bake in a 450* oven for 15-20 minutes. This will carmelize the tomatoes.
 And they will look like this when they come out of the oven.
Dump the baked tomatoes and the simmered veggies into a blender and blend the snot out of em, which, translated into more feminine terms would be between 3-4 minutes on the highest setting until it has a creamy texture. If I were a blender manufacturer I'd design a snot setting one click beyond pulverize. You could also try blending this mixture until no celery threads get stuck between your teeth, but then you'd have to eat the soup before it was done and that would pretty much defeat the purpose of making it in the first place. Dumb idea. Just blend the snot out of it.
 Notice my blender does not have a snot setting. Nor does it have a pulverize setting. I have no idea where David gets his blenders, but obviously not at the same store I shop at.
 I used HI and Icy drink and it worked just fine.
Dump everything back into your soup pan and while you let it simmer for, say 10 or 15 minutes, stir in 1/4 cup of chopped basil leaves and a cup of soy milk. The soy milk is optional. You can leave it out if you don't have any around the house. Everything else is pretty common kitchen fare.

I purchase my basil fresh like this in the produce aisle.
 Be sure you use original or plain soy milk. I like the vanilla to drink, but use the plain to cook with. There are many different brands, this is the one I prefer.
 MMMM. My house smells so good right now.
There it is. A pretty healthy tomato soup. Its fairly fresh, but its not raw like fresh-from-the-garden cold soups. Its also fairly healthy though it doesn't max out on the high enzyme charts with all the cooking that degrades some enzymes. Add a leafy green salad (a big one) and you'll get all the enzymes you need to keep your energy levels up. This soup is a home run in every other health and nutrition category. From the tomatoes to the healthy olive oil, to the onion and celery and herbs. Its a great soup for you and your family's health.Our family loves it. We hope you will too. If you try it and like it, let me know. If you don't like it, the soup Nazi has a word of advice: "No soup for you!"

I choose baby spinach with kiwi slices and bambino watermelon chunks for the salad.
This soup is filling and oh so good. I will never eat tomato soup from a can again.


