Today let's talk knives. What you want to look for when purchasing your knives is very important. I was going to write it all for you, but then I found this great article at Amazon
Because I want to give credit where credit is due, I copied and pasted the entire article, so everything following is from Amazon Know How:
Handle, tang, bolster, blade: that is how a knife is made
There's more to a kitchen knife than a sharp edge. Look for these basics before you buy.
-Handle: Is the handle a clunky piece of hardwood or a sleek piece of rosewood? Or do you prefer a synthetic handle, something a little more ergonomic? The choice can often be personal, and it's not simply a matter of price. Wood has a natural warmth, but actual shaping is limited by the process of mass production. Synthetic handles won't crack and often have the feel of custom-made cutlery. And you'll want to take the size of your hand into account: a small hand will quickly tire of a hefty handle.
-Tang: The tang is the extension of the blade to which the handle is attached with rivets. If the tang doesn't pass through the entire handle, look for another knife--or start saving for an upgrade. The full tang is where you get the weight, balance, and stability of a high-quality knife. The best knife manufacturers use full tangs in all their knives, large and small.
-Bolster: The thick piece of metal between the handle and the heel of the blade, particularly on French-style chef's knives, is also a shield between your fingers and the cutting edge. It's there for safety's sake, and it adds to the balance of the knife. A well-balanced, sharp knife is effortless to use. But not all styles of knives have--or demand--bolsters.
-Blade: The size and shape of the blade help determine function. Boning a chicken with a chef's knife is probably how chicken nuggets were discovered. Select the right blade for the task at hand.
-Construction: There's a reason that stamped blades are less expensive than forged blades: they are punched out of sheets of steel with knife-blade-shaped dies. High-end knives often lay claim to being hand-forged. This doesn't mean an Old World master craftsman worked the blade at a forge and anvil with a big hammer. Picture a factory laborer with a pair of tongs holding on to a hot piece of steel for the several blows of a 100-ton drop forge. There are, however, many steps in the process of making a high-quality knife, and in a couple of them you can count on some human intervention.
Blade Material
-High-carbon stainless steel: Some of the best blades are made of either high-carbon steel or high-carbon stainless steel. The difference between the two kinds of steel is in the alloy, which must be at least 13% chromium to be rust- and stainproof high-carbon stainless steel. Companies such as Wüsthof, Henckels, Forschner, and Tramontina use high-carbon stainless.
-High-carbon steel: High-carbon steel blades, on the other hand, will tarnish over time. But they take a better edge, and it's easier to maintain. The blade is also more flexible. But it does demand a certain amount of upkeep--wiping it dry after use, for example. Or washing it after cutting acidic produce such as onions. Sabatier uses high-carbon steel in some of its knives.
-Ceramic: The relatively new ceramic blades are light and extremely sharp from the factory. But you can't sharpen these knives at home once they lose their edge. The edge is glassy-smooth and will glide across some materials--the paperlike skin of an onion, for example--rather than slicing through. There's no chance of corrosion with ceramic, but it is fragile. Chip the edge and only a wet diamond grinder can bring it back. Fortunately, they're usually backed with a strong warranty.
Types of Blades
-Chef's knife: This is the kitchen workhorse--the main piece of steel--in lengths of 6, 8, and 10 inches for the most part. If you have a big hand, a 6-inch chef's knife will be an annoyance, while a small hand may quickly tire of a 10-inch blade. The blade of a chef's knife is designed to rock on a cutting board for tasks from chopping on down to mincing. The weight and balance of the blade work to your advantage. You can spend $25 to $130 for a good, commercially manufactured chef's knife.
-Boning and fillet knives: These knives come in 5-, 6-, and 7-inch lengths. If you work with a lot of meat, poultry, and fish, you will want one of each. The fillet knife is long and straight, thin and flexible. Boning knives tend to have a curve to the blade, but can be either flexible or rigid. You use the flexible blade to bone poultry, the rigid boning blade to work around bigger bones. These knives cost between $10 and $65.
-Paring and peeling knives: These are little knives you will reach for almost as often as you do your chef's knife. The peeler often has a hooking curve to the blade and is great for cutting zest from citrus fruit. You'll use small knives for any number of peeling, paring, and shaping chores, not to mention cutting the string after you have tied up the chicken for roasting. These run from 2 to 4-1/2 inches and $15 to $50.
-Specialty blades: Cleavers, carving knives, serrated knives, Asian-style vegetable knives: these all have their right place and right time. The long, thin-bladed nature of a carving knife allows for perfect slicing of roasts or fowl. Serrated knives and crusty bread were made for each other. In fact, if you use your good chef's knife to slice crusty bread, you will ruin its edge.
Sharp Advice
Buy the best knives you can afford, and plan on using them for the rest of your life. Knife design has evolved over hundreds of years. If there's a flashy new kid on the block, ask yourself if the new design will stand up over time. Will it be comfortable? Is it necessary?
Knife Care
-Clean your knives after you use them.
-Store your knives in a knife block. Do not throw sharp knives into a drawer.
-Keep your knives out of the dishwasher. This protects the handle and the edge, and it protects your fingers when you aren't paying attention.
-Maintain a good edge with a ceramic stick or a steel.
-Teach your family basic knife skills.
*******************
Eat Well, Live Well
 Combine flour, sugar and butter in processor and mix until consistency of coarse meal.
 Combine yolk and water in small bowl.
 Roll dough between sheets of waxed paper into 10 inch circle.
 I scraped it all off of the wax paper, formed a ball
 Meanwhile, combine yolks and sugar in small bowl and whisk to blend.
 When milk is boiling, gradually stir about 1/3 into yolk mixture
 Blend completely
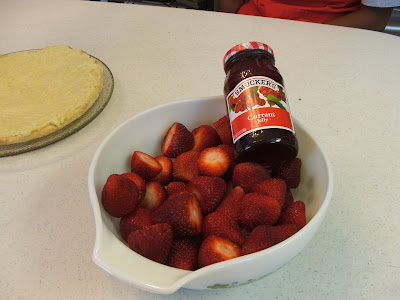
 Place strawberries stem end down in concentric circles to cover top
 With all the strawberries
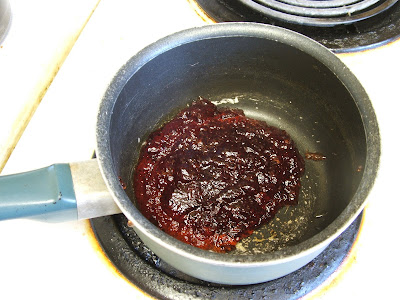
 Press jelly through strainer into small saucepan to break up any lumps.
 Bring to boil over medium heat.
 Immediately brush over strawberries and outer edge of crust to glaze completely.
 You can use a spoon if you don't have a pastry brush


 Enjoy a bowl of home made ice cream


